
Here is a test of Google's NotebookLM having a deep dive conversation about Intangible Medium…
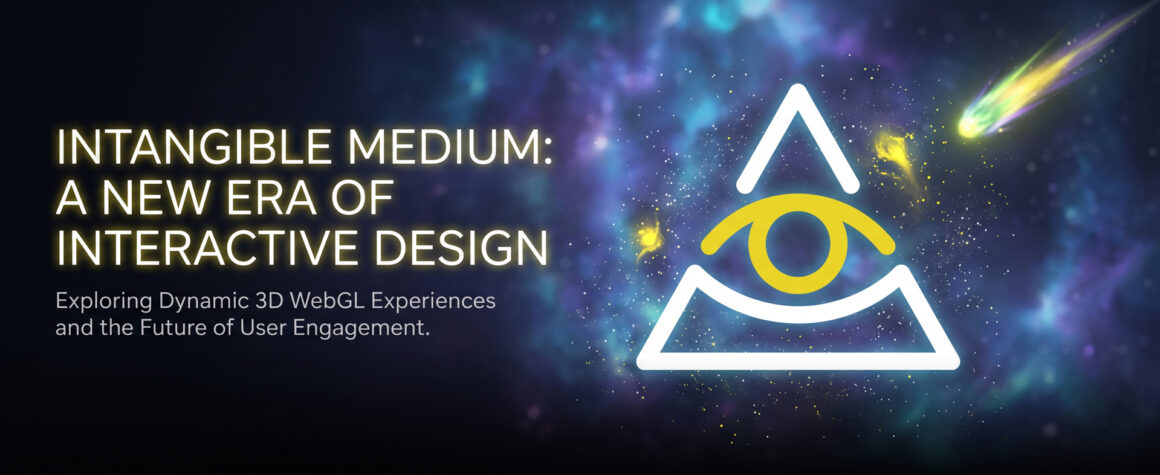
Deconstructing the Void & Crafting an Interactive 3D Emblem with Three.js
Move mouse to interact • Click to reset
As an artist and creative developer working at the intersection of design and code, I am obsessed with the boundary where clean brand marks meet responsive, tactile digital interactions. I recently asked myself a simple question: What happens when you take a flat 2D brand mark, pull it apart into three dimensions, and cast it adrift into deep celestial space?
What started as an afternoon experiment in my studio evolved into an interactive WebGL showcase: a gleaming golden artifact that dynamically splits apart along the Z-axis as you move your mouse, anchored against an endless starfield traversed by rare, multi-color chromatic comets.
In this deep dive, I’ll walk through the architectural blueprint of this experiment, dissect the scripts and techniques I used, compare my stack to tools like p5.js, and give you a step-by-step tutorial to construct your own version.
1. Why Three.js Over p5.js?
When developers and creative technologists want to make something move on the web, their minds often jump to p5.js, and for good reason. p5.js has democratized creative coding. But as an artist, experimenting with different engines is half the fun, and each tool nudges your creative process in a distinct direction.
Here is how I evaluated the landscape:
| Feature | p5.js (WEBGL Mode) | Three.js (r160+) |
|---|---|---|
| Mental Model | Immediate Mode: setup() and draw() run procedurally every frame. |
Retained Mode: A hierarchical Scene Graph with persistent meshes, lights, and cameras. |
| Material Systems | Basic Lambert/specular shaders. Realistic PBR (physically based rendering) requires custom GLSL shaders. | Out-of-the-box MeshStandardMaterial and MeshPhysicalMaterial with roughness, metalness, clearcoat, and environment reflections. |
| Geometry Handling | Great for primitives and math-driven meshes (beginShape(), parametric curves). |
Production-ready loaders (SVGLoader, GLTFLoader, OBJLoader) with automatic triangulation algorithms. |
| Post-Processing | Requires manual framebuffer render passes and bespoke GLSL filters. | Extensible EffectComposer pipeline with battle-tested bloom, tonemapping, depth-of-field, and chromatic aberration passes. |
| Ideal For | Rapid computational art, generative sketches, 2D/3D experiments, educational demos. | High-fidelity WebGL experiences, interactive 3D portfolios, photorealistic lighting, and complex asset pipelines. |
The Verdict
p5.js remains one of my favorite environments for rapidly sketching generative math or expressive algorithmic sketches. But for this piece, I really wanted to explore a different paradigm. I wanted to see what would happen if I traded immediate-mode procedural loops for a structured, retained scene graph. Diving into Three.js gave me an exciting alternative method to tackle complex vector path extrusion, accurate hole triangulation, metallic specular responses, and selective bloom post-processing, treating each layer of the emblem as an independent node in 3D space with its own dynamic transforms.
2. Anatomy of the Stack: The Scripts I Used
One of my core design constraints was keeping this project lightweight, portable, and build-tool free. I used native ES Module Import Maps loaded directly via CDN:
three.module.js(r160): The core WebGL engine providing the scene graph, perspective camera, lights, materials, and renderer.SVGLoader.js: Parses raw SVG<path>data strings, calculates bezier curves, and translates them into 2D polygon profiles (THREE.Shape).EffectComposer.js&RenderPass.js: Manages offscreen multi-pass rendering buffers instead of drawing directly to the canvas on every tick.UnrealBloomPass.js: Implements a high-dynamic-range (HDR) bloom effect based on the Unreal Engine glow algorithm, giving the metallic bevels and comets an emissive luminance.OutputPass.js: A mandatory pass in modern Three.js that correctly resolves color spaces (sRGB) and tone mapping (ACES Filmic) when post-processing is active.
<!-- Native Import Map: No Webpack or Vite required --> <script async src="https://unpkg.com/es-module-shims@1.6.3/dist/es-module-shims.js"></script> <script type="importmap"> { "imports": { "three": "https://unpkg.com/three@0.160.0/build/three.module.js", "three/addons/": "https://unpkg.com/three@0.160.0/examples/jsm/" } } </script>
3. Step-by-Step Tutorial: Building Your Own Version
Let’s break down the implementation into its core engineering challenges.
Step 1: Converting 2D SVG Paths into Beveled 3D Solids
The core emblem consists of three distinct vector components: a bottom triangular cradle, a central golden eye, and a floating top chevron.
To convert raw SVG d="..." path strings into 3D geometry without loading external assets, wrap the string in minimal XML and parse it with SVGLoader:
import { SVGLoader } from 'three/addons/loaders/SVGLoader.js'; const loader = new SVGLoader(); function createMesh(pathData, material) { // 1. Parse raw path data into ShapePath const shapePath = loader.parse( `<svg xmlns="http://www.w3.org/2000/svg"><path d="${pathData}" /></svg>` ).paths[0]; const shapes = SVGLoader.createShapes(shapePath); // 2. CRITICAL: Correct winding orders so internal cutouts render as holes shapes.forEach(shape => { if (THREE.ShapeUtils.isClockWise(shape.getPoints())) { shape.curves.reverse(); } shape.holes.forEach(hole => { if (!THREE.ShapeUtils.isClockWise(hole.getPoints())) { hole.curves.reverse(); } }); }); // 3. Extrude the shapes into 3D with beveled edges const extrudeSettings = { depth: 8, bevelEnabled: true, bevelSegments: 4, steps: 1, bevelSize: 1.0, bevelThickness: 1.0 }; const geometry = new THREE.ExtrudeGeometry(shapes, extrudeSettings); // Scale and flip the Y-axis (SVG Y-coordinates go downward) geometry.scale(0.022, -0.022, 0.022); // Recompute vertex normals to guarantee smooth, correct light reflection geometry.computeVertexNormals(); return new THREE.Mesh(geometry, material); }
The Gotcha I Solved: In WebGL, if the winding order (clockwise vs. counter-clockwise) of an outer shape and an inner cutout match, the triangulation algorithm treats the hole as a solid face. Inverting the hole curves ensures the eye cutout remains hollow!
Step 2: Conquering the “Black Metal” Problem
Pure physical metals (metalness: 1.0, roughness: 0.0) act as mirrors. If your 3D scene doesn’t have an intense environment map reflecting back at the camera, metallic surfaces look flat black.
To achieve a bright, lustrous gold and silver that remains vibrant under all camera angles:
- Back off
metalnessslightly (down to0.2–0.3) so the surface retains diffuse color. - Add a subtle base
emissivecolor. - Flood the scene with a high-intensity directional light directly facing the geometry.
const goldMaterial = new THREE.MeshStandardMaterial({ color: 0xffcc00, emissive: 0x664400, // Keeps shadows warm and radiant metalness: 0.2, roughness: 0.2 }); const silverMaterial = new THREE.MeshStandardMaterial({ color: 0xffffff, emissive: 0x333333, metalness: 0.2, roughness: 0.2 });
Step 3: Mathematical Center Anchoring
Because triangular marks have their visual center of mass higher or lower than their bounding box center, manual offsets often look crooked. I solved this by grouping all three layers and mathematically subtracting the combined center point from each child:
const logoGroup = new THREE.Group(); logoGroup.add(baseMesh, eyeMesh, chevronMesh); const groupBBox = new THREE.Box3().setFromObject(logoGroup); const centerOffset = new THREE.Vector3(); groupBBox.getCenter(centerOffset); logoGroup.children.forEach(child => { child.position.sub(centerOffset); // Cache the centered Z coordinate for interactive splitting later child.userData.baseZ = child.position.z; }); scene.add(logoGroup);
Step 4: Interactive Mouse Parallax & Layer Splitting
The magic happens when the viewer interacts with the mark. Moving the mouse splits the three layers apart along the Z-axis while smoothly rotating them:
- The Base Mesh retreats backward along the negative Z-axis.
- The Golden Eye leaps forward toward the camera.
- The Chevron floats intermediate between them.
let targetX = 0; let targetY = 0; let isResetting = false; document.addEventListener('mousemove', (event) => { if (isResetting) return; targetX = (event.clientX - window.innerWidth / 2) / (window.innerWidth / 2); targetY = (event.clientY - window.innerHeight / 2) / (window.innerHeight / 2); }); // Click anywhere to trigger a cinematic reset document.addEventListener('click', () => { isResetting = true; targetX = 0; targetY = 0; setTimeout(() => { isResetting = false; }, 1800); });
Inside the animation loop, linear interpolation (THREE.MathUtils.lerp) applies silky easing:
const lerpSpeed = isResetting ? 0.035 : 0.08; // Slowly spin the whole assembly logoGroup.rotation.y += 0.005; // Layer splitting along Z baseMesh.position.z = THREE.MathUtils.lerp( baseMesh.position.z, baseMesh.userData.baseZ + (targetY * -1.5), lerpSpeed ); eyeMesh.position.z = THREE.MathUtils.lerp( eyeMesh.position.z, eyeMesh.userData.baseZ + (targetY * 2.5), lerpSpeed ); chevronMesh.position.z = THREE.MathUtils.lerp( chevronMesh.position.z, chevronMesh.userData.baseZ + (targetY * 0.5), lerpSpeed );
Step 5: Building the Chromatic Multi-Color Comet
To give the scene life, I built a custom comet engine that shoots celestial comets across the background. I enforced two rules:
- Strictly one comet at a time.
- A multi-color chromatic spectrum tail.
Instead of loading an image asset, I generated a high-resolution color ramp using a dynamic HTML5 Canvas:
function createCometGradientTexture() { const canvas = document.createElement('canvas'); canvas.width = 64; canvas.height = 512; const ctx = canvas.getContext('2d'); // Linear spectrum from head (apex) to tail base const grad = ctx.createLinearGradient(0, 0, 0, 512); grad.addColorStop(0.00, 'rgba(255, 255, 255, 1.0)'); // White nuclear core grad.addColorStop(0.08, 'rgba(110, 245, 255, 0.95)'); // Cyan grad.addColorStop(0.26, 'rgba(150, 95, 255, 0.90)'); // Violet grad.addColorStop(0.50, 'rgba(255, 65, 200, 0.82)'); // Nebula Magenta grad.addColorStop(0.74, 'rgba(255, 175, 45, 0.55)'); // Solar Gold grad.addColorStop(1.00, 'rgba(255, 45, 20, 0.0)'); // Ember falloff ctx.fillStyle = grad; ctx.fillRect(0, 0, 64, 512); const texture = new THREE.CanvasTexture(canvas); texture.needsUpdate = true; return texture; }
The tail itself is an open-ended THREE.ConeGeometry translated so its tip rests on the nucleus, oriented to point backward along the velocity vector:
const coreTailGeo = new THREE.ConeGeometry(0.20, 6.8, 16, 1, true); coreTailGeo.translate(0, -3.4, 0); // Anchor apex at origin coreTailGeo.rotateX(Math.PI / 2); // Point tail backward const coreTailMat = new THREE.MeshBasicMaterial({ map: cometTexture, transparent: true, opacity: 0.95, blending: THREE.AdditiveBlending, side: THREE.DoubleSide, depthWrite: false });
During each frame, its flight vector updates using .lookAt() so the tail always streams naturally behind its path:
if (cometActive) { cometPos.add(cometVel); comet.position.copy(cometPos); if (Math.abs(cometPos.x) > 42 || cometPos.y < -35) { cometActive = false; comet.visible = false; cometSpawnDelay = 2.0 + Math.random() * 3.5; // Random pause before next comet cometTimer = 0; } }
Step 6: Post-Processing & The Seamless Page Blend
Without post-processing, 3D graphics can look sterile. I assembled an EffectComposer pipeline configured with UnrealBloomPass:
const composer = new EffectComposer(renderer); composer.addPass(new RenderPass(scene, camera)); const bloomPass = new UnrealBloomPass( new THREE.Vector2(window.innerWidth, window.innerHeight), 0.15, // Tight bloom strength 0.2, // Crisp radius 0.85 // High threshold so only specular highlights glow ); composer.addPass(bloomPass); // CRITICAL: OutputPass maps colors correctly when composer is active composer.addPass(new OutputPass());
Finally, to let this hero element transition into the rest of a page’s content, I overlay a feathered CSS gradient along the viewport bottom:
.bottom-gradient { position: absolute; bottom: 0; left: 0; width: 100%; height: 140px; background: linear-gradient( to bottom, rgba(0, 0, 0, 0) 0%, rgba(0, 0, 0, 0.25) 35%, rgba(0, 0, 0, 0.75) 75%, #000000 100% ); pointer-events: none; /* Allows mouse interactions to pass straight through */ z-index: 5; }
4. Key Takeaways from the Studio
- Bevels make the brand. Flat extrusions look like cardboard cutouts; adding bevels gives light something to glance off of, which elevates your bloom effects.
- Post-processing requires care. Adding an
UnrealBloomPasswithout anOutputPasswill bypass your renderer’s tone mapping and crush your contrast. Always includeOutputPassin modern Three.js setups. - Procedural canvas textures are superpowers. You don’t need a 2MB PNG for smooth color ramps. Generating textures on an offscreen
<canvas>keeps your bundle tiny and allows dynamic runtime recoloring.
The Full Code
Move mouse to interact • Click to reset
Related Posts

This Post Has 0 Comments